
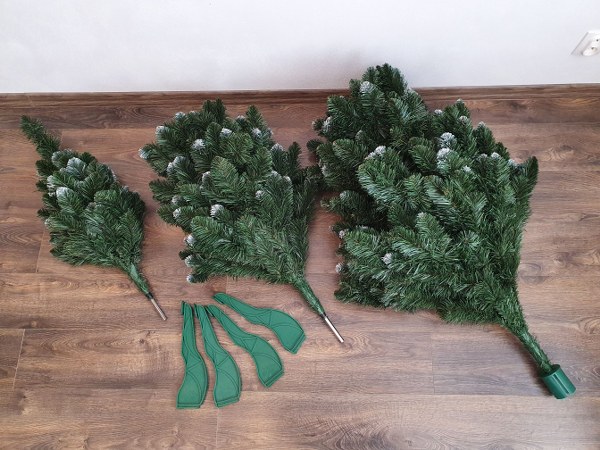
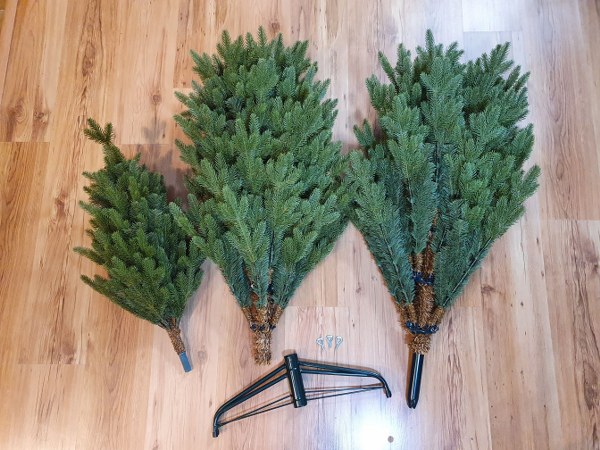
When assembling a Christmas tree, the most important thing is to choose a suitable place with enough space to unfold it. Every tree you buy from us is folded and stored in a box so that it takes up as little space as possible. After unpacking the box, check its contents. Christmas trees in sizes up to 150 cm consist of one part, while trees in sizes from 180 cm are composed of 3 parts. In addition to the tree itself, the package also includes a stand for the tree. The type of stand you will have in the box depends on the type of tree you order. You will receive either a metal stand, with which you also receive screws to tighten the trunk of the tree, or an artificial stand, which consists, depending on the height of the tree, in an unfolded state with 3 or 4 legs.
Contents of the box
Step by step
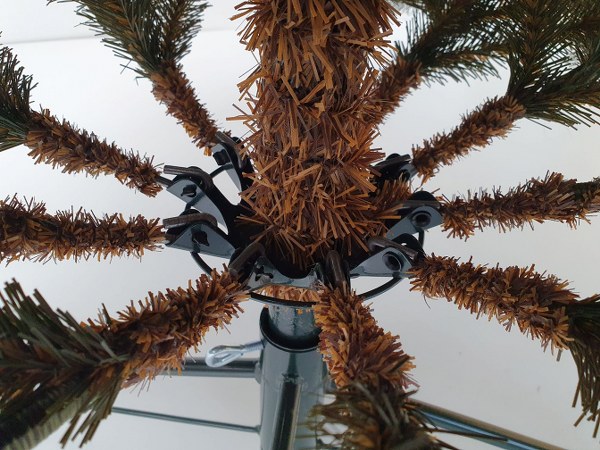
1. Stand installation
(tree with a metal stand)
Unpack the metal stand and stretch it into an X shape. Insert the bottom part of the tree (the largest part A) into the hole in the middle and tighten the trunk of the tree with the screws that are included with the stand. Make sure the center of the tree is firmly inserted and retracted in the stand.
(tree with an artificial stand)
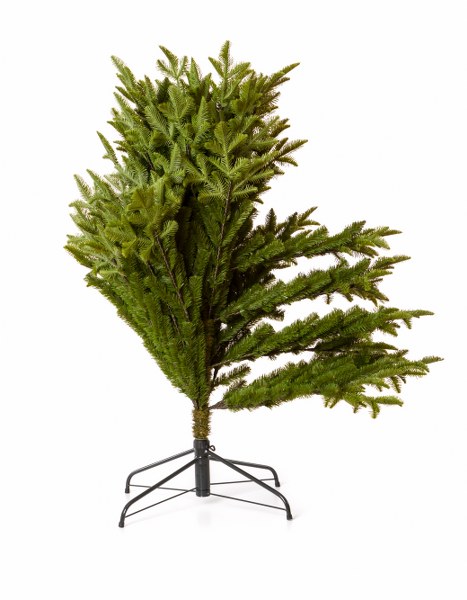
We take the bottom part of the tree (the largest part A) and turn it upwards. Step by step, push the legs of the stand into the predetermined holes as far as they will go. We make sure that the legs are inserted correctly, turn the tree over and place it on the ground with the stand.
2. Branch stretching
With our trees, you can meet two types of branch stretching systems.
traditional unfolding system

The branches are part of the trunk of the tree and therefore it is necessary to manually stretch them to a 90° position. We’ll start with the bottom row and make sure we’ve stretched all the branches. When stretching the branches, care must be taken to ensure that they have the same spacing between them. After that, we will start arranging the twigs.
snap tree system
Let the tree branches fall freely to their place, or gently pull them down. With this system, you don’t have to worry about placing them at a 90° angle, because the branches fit exactly into the predetermined grooves and the tree will thus possess a perfect shape. After spreading the first (bottom) row of branches, we start to stretch the little twigs.
3. Branch arrangement
The unwritten rule says that only one person should arrange the tree. This will ensure that the tree looks the same from every side. We always start arranging the branches from the center towards ourselves. We do not spread the twigs one row after the other, but we always try to spread them to a different side, thus achieving a denser appearance of the tree. With some types of trees, the twigs are already attached in advance in the direction in which they have to be spread. We always spread the last row of twigs into a star, thanks to what the tree will possess a perfect shape and appearance.

4. Row by row
After spreading the very low row of branches and arranging the twigs, we continue to unfold each other row according to the same procedure.
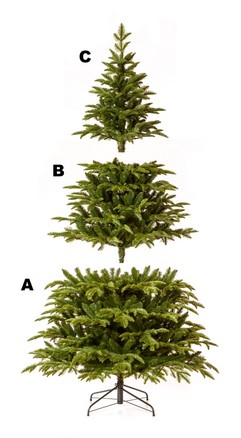
5. Insert the middle part B

After completing the bottom part A, we insert the middle part B and proceed in the same way as for the bottom part.
6. Insert the upper part C

After completing the middle part B, we insert the upper part C and proceed in the same way as for the other parts.
You could be also interested in following articles:
Choosing a Christmas tree – customer´s guide
Christmas trees play a big role in our favorite holiday traditions. We decorate, open presents and enjoy the Christmas atmosphere with friends and family around the tree…
How to decorate a Christmas tree? Year 2020 trends

What are the trends in decoration of a Christmas tree? How to decorate your Christmas tree this year? We bring you some interesting inspirations and trends for year 2020 right from our customers…